Quick Start
Create a tenant, two entities, a resource, and see your first authorization allow and deny decisions in the Atom Next UI.
This walkthrough builds one complete access-control scenario using only the Atom Next UI —
no curl, no GraphQL. By the end you will have:
- a tenant (
acme-corp), - two entities — a human (
Alice) and a service (billing-service), - a resource (
invoice-events) two actions apply to, - two permission blocks (read-only, and read+write),
- two roles that wrap those blocks,
- two direct policies that grant the blocks to Alice and billing-service, and
- four authorization checks in the debugger, including one allow and one deny.
It mirrors the Getting Started with Atom blog post. See Access Control for the concepts behind roles, permission blocks, and direct policies.
Prerequisites
Atom is running (make up) and reachable at http://localhost:8080 (API) and
http://localhost:3005 (UI). See Quickstart if you have not started the stack
yet.
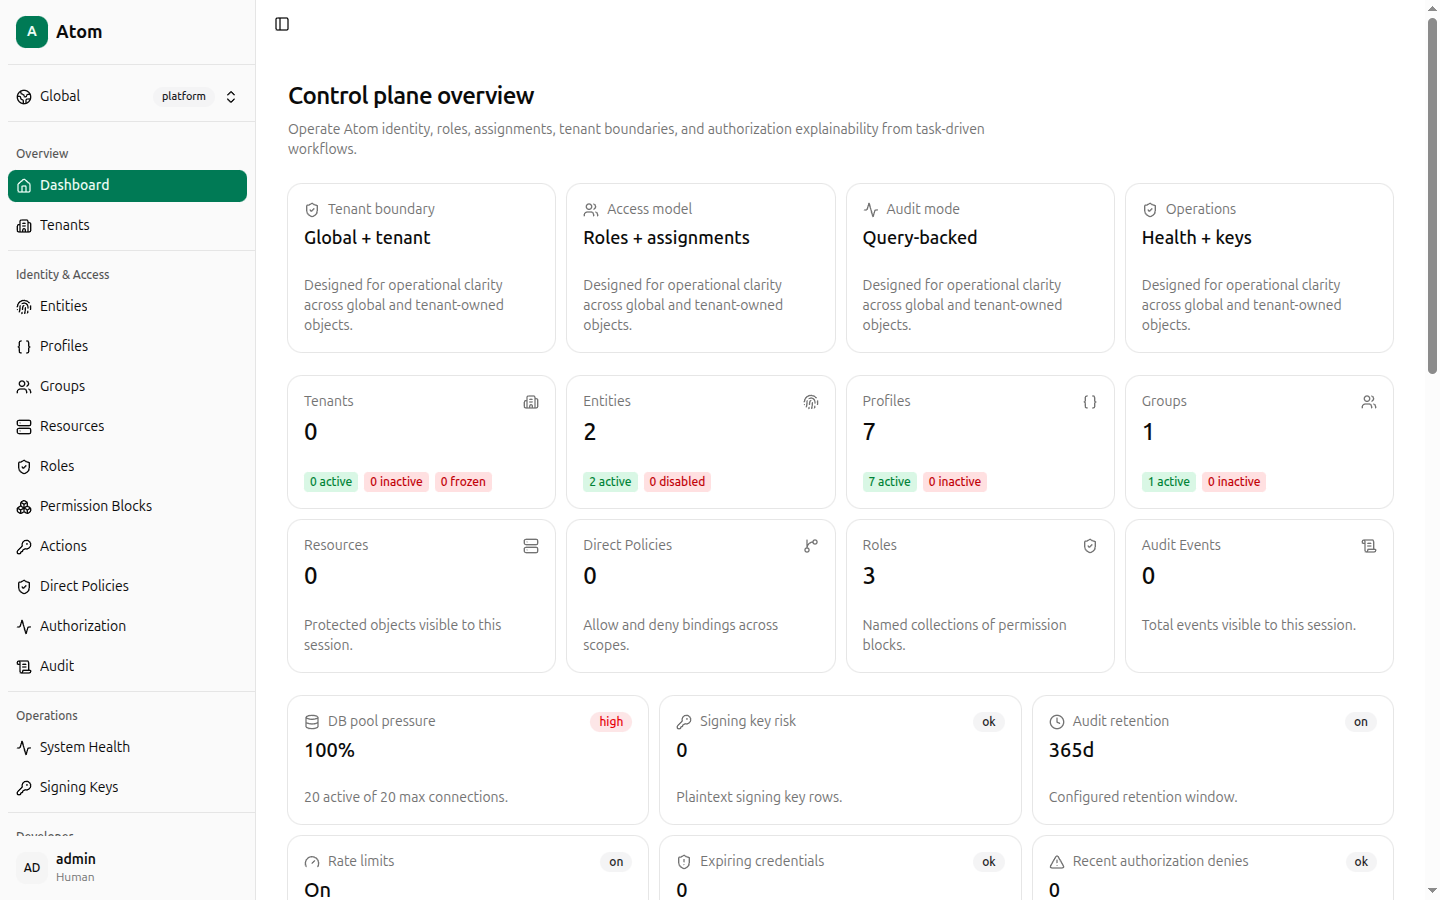
Sign in
Open http://localhost:3005/login and sign in with admin / 12345678 (the default dev
credentials — change ADMIN_SECRET in .env before running this anywhere else). You land on
the Dashboard, which summarizes tenants, entities, roles, and platform activity.
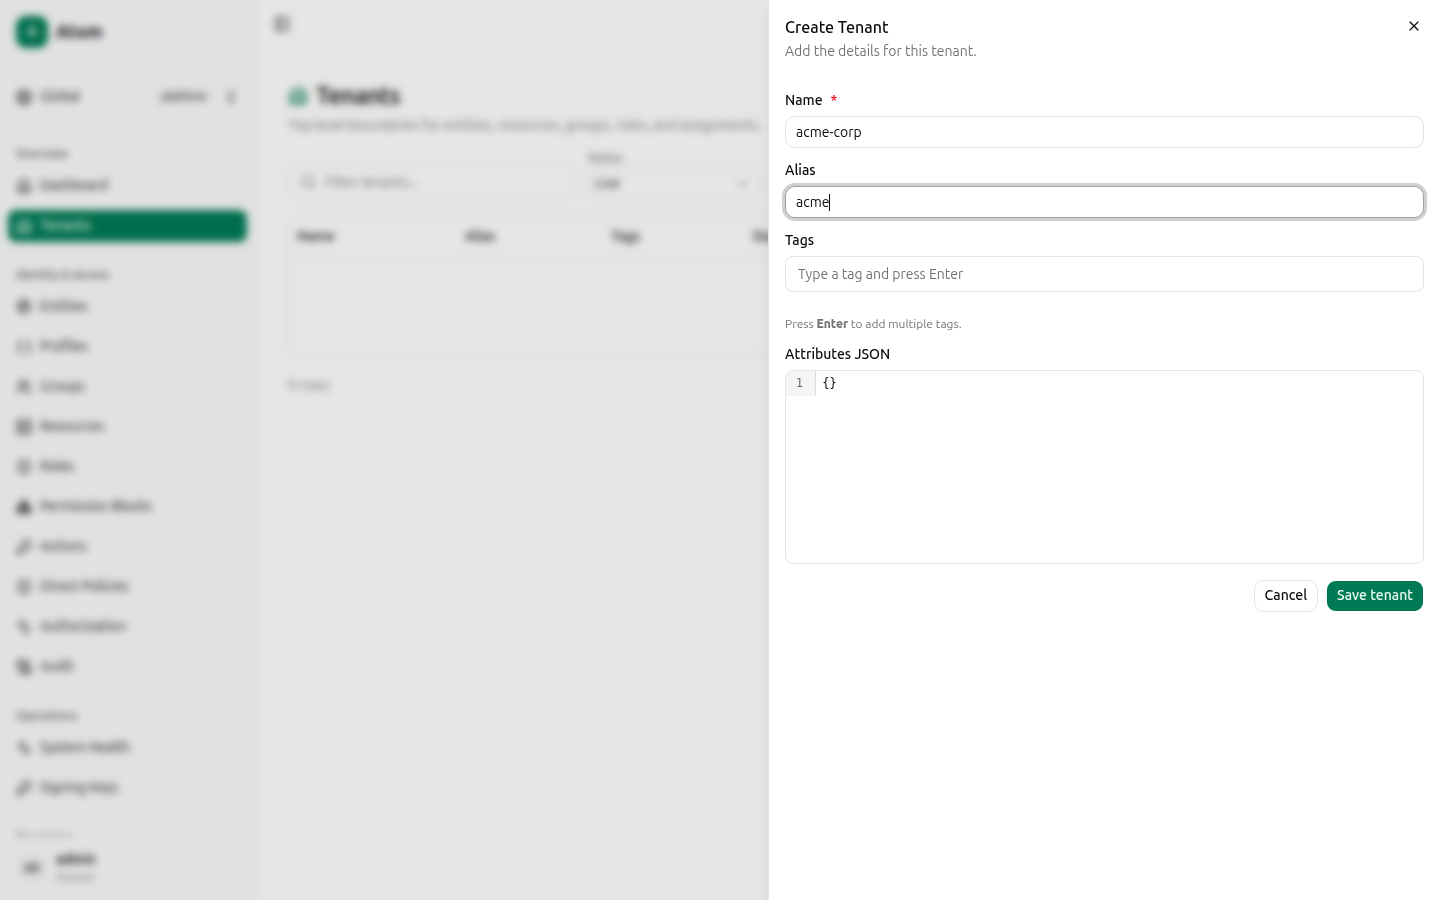
Create a tenant
Open Tenants in the sidebar. The table is empty on a fresh instance. Click + Create in the top-right corner.
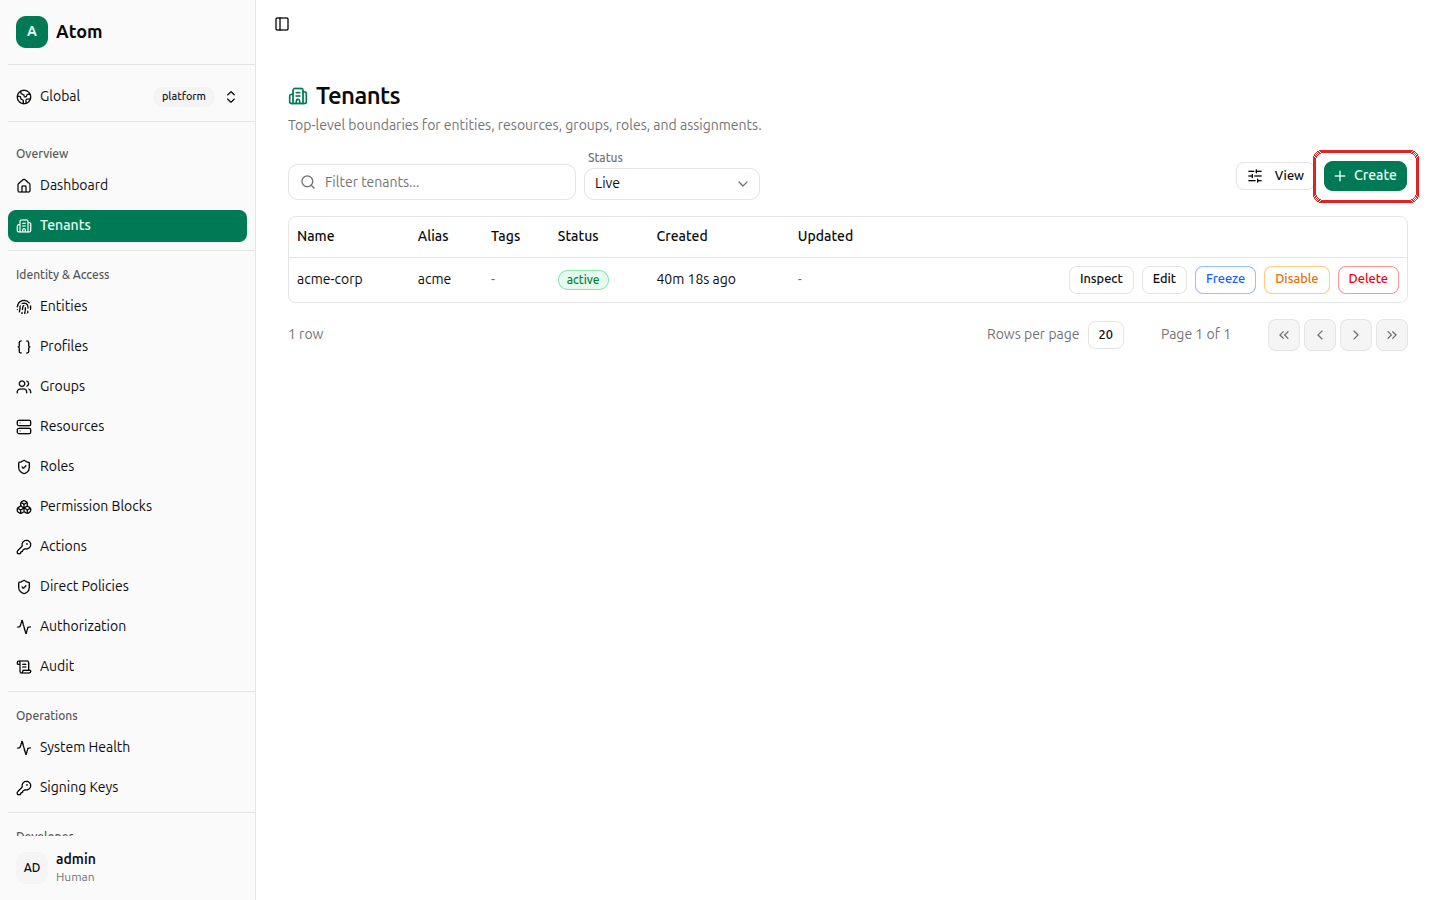
Fill in:
- Name:
acme-corp - Alias:
acme
Leave Tags and Attributes JSON empty, then click Save tenant.
The new tenant appears in the table with row actions Inspect, Edit, Freeze,
Disable, and Delete. Click Inspect if you want to copy its ID — you won't need it
for this walkthrough since every later form lets you pick acme-corp by name.

Switch your working context to the new tenant using the Global / platform switcher at the
top of the sidebar, or leave it on Global and pick acme-corp explicitly in each form
below — both work, since every create dialog has its own Tenant field.
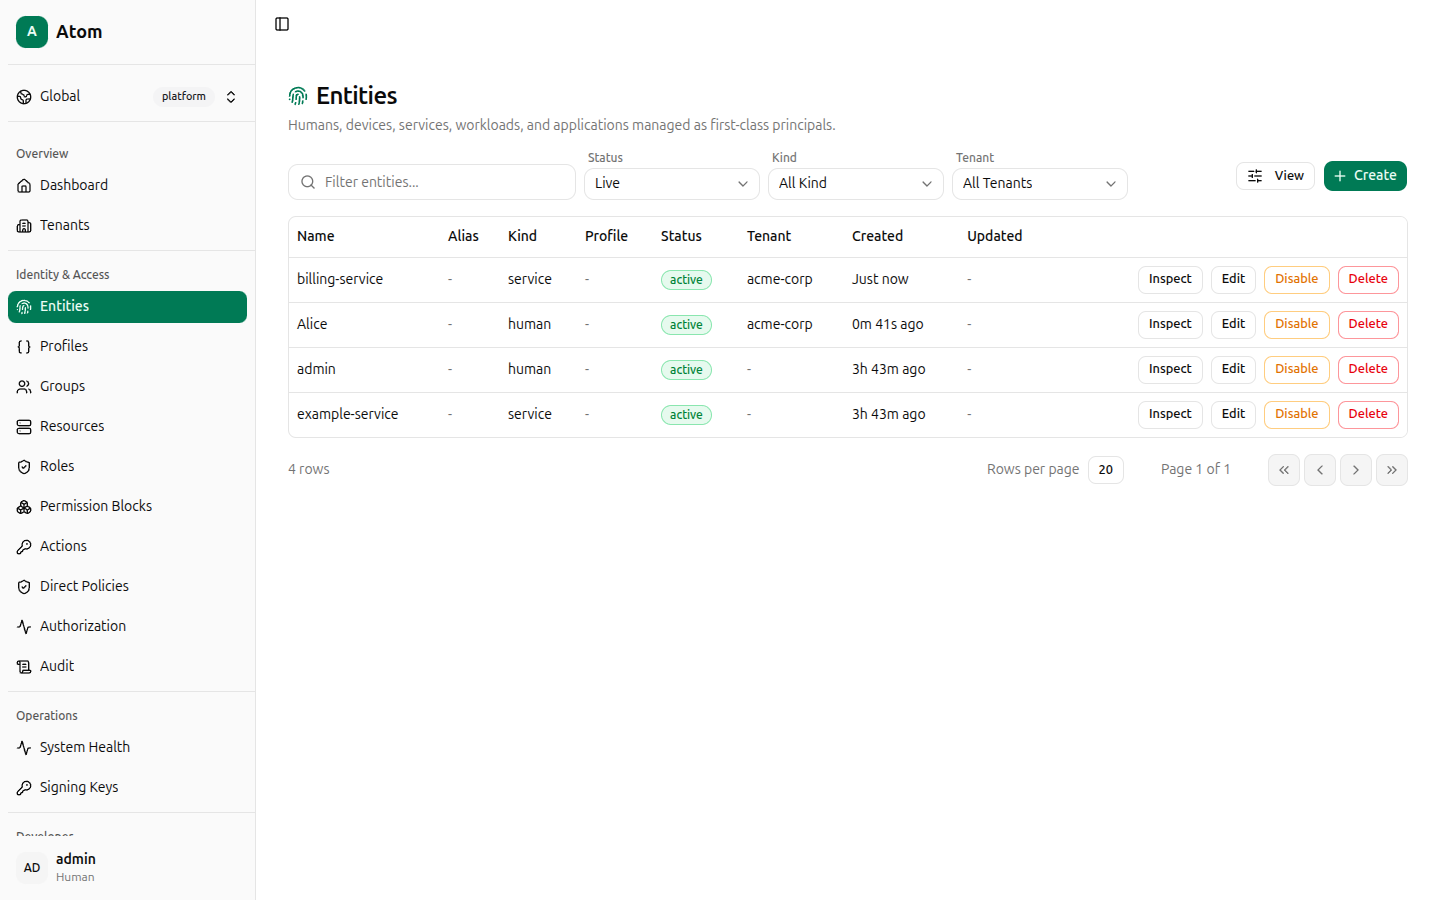
Create two entities
Open Entities. Click + Create.
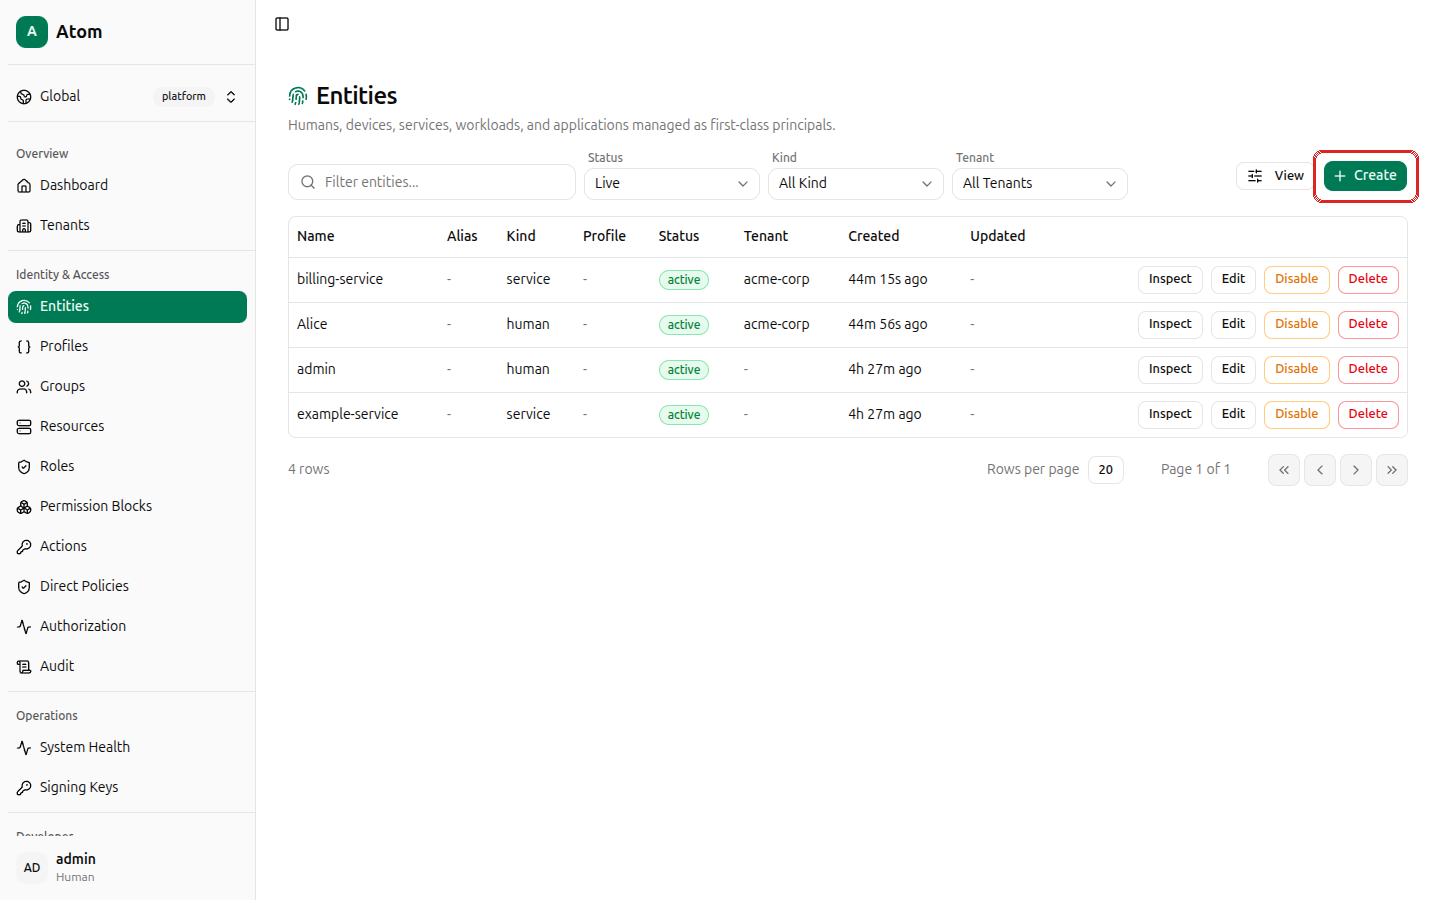
Create the first entity:
- Name:
Alice - Kind:
human - Tenant:
acme-corp - Leave Profile as No profile.
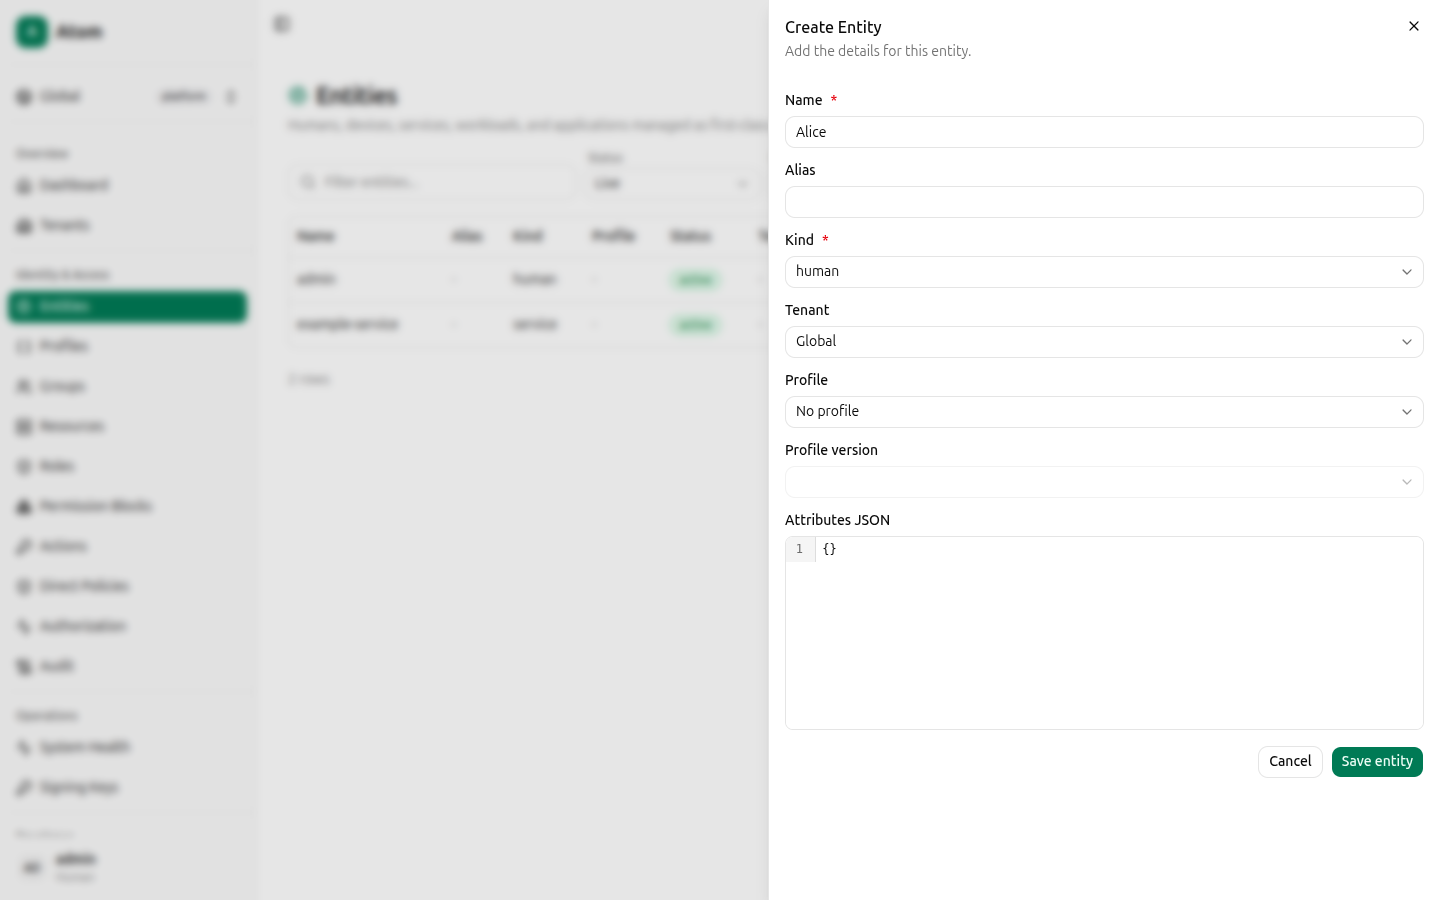
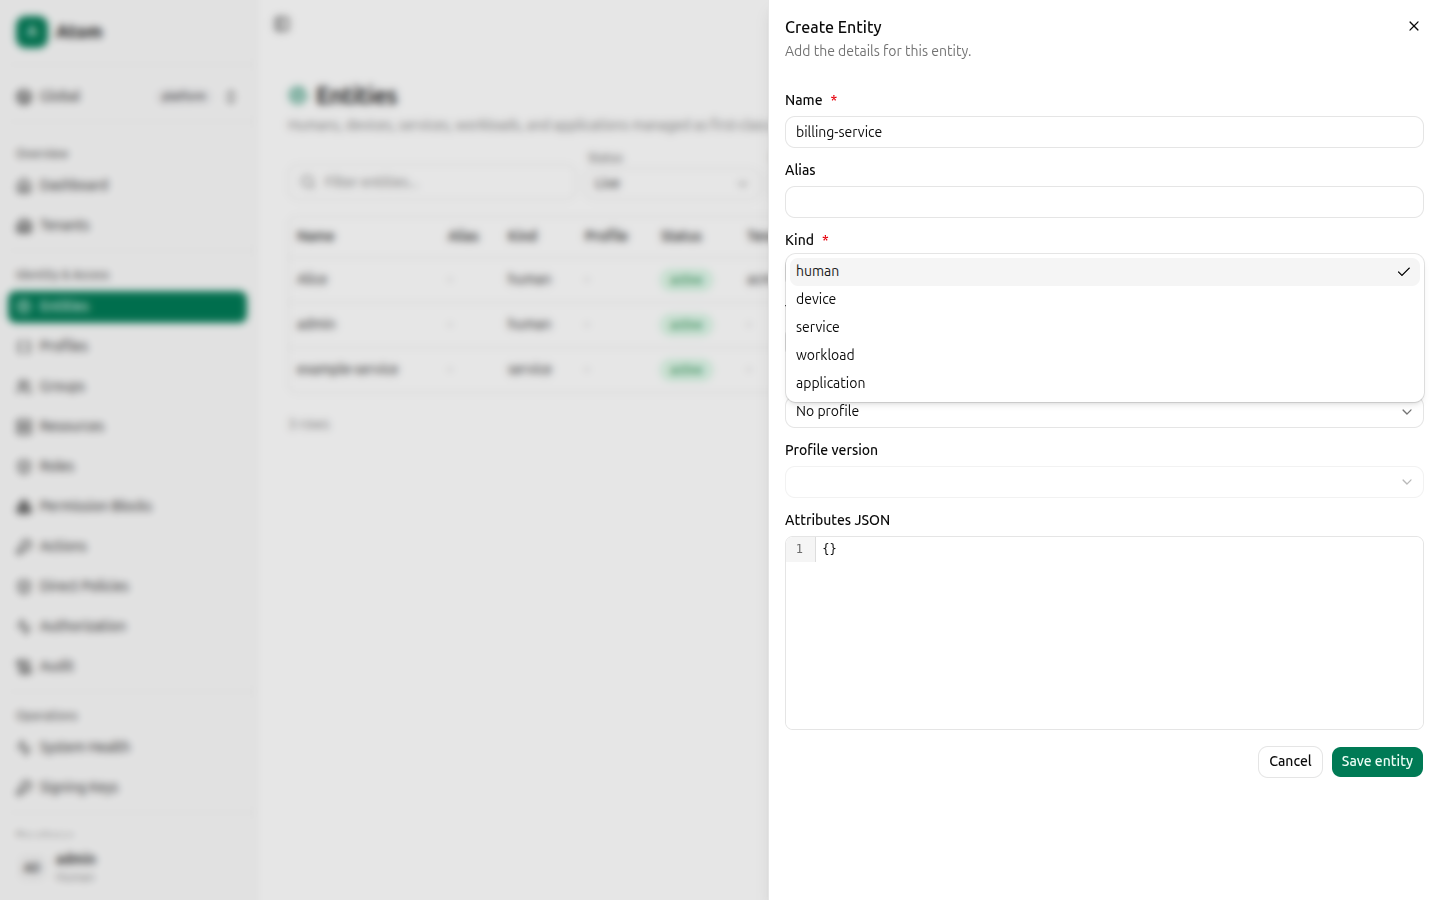
Click Save entity. Repeat for a second entity:
- Name:
billing-service - Kind:
service(the Kind dropdown also offersdevice,workload, andapplication— pick whichever matches what you're modeling) - Tenant:
acme-corp
Both entities now appear in the table, alongside any entities Atom seeded on first boot
(admin, example-service).
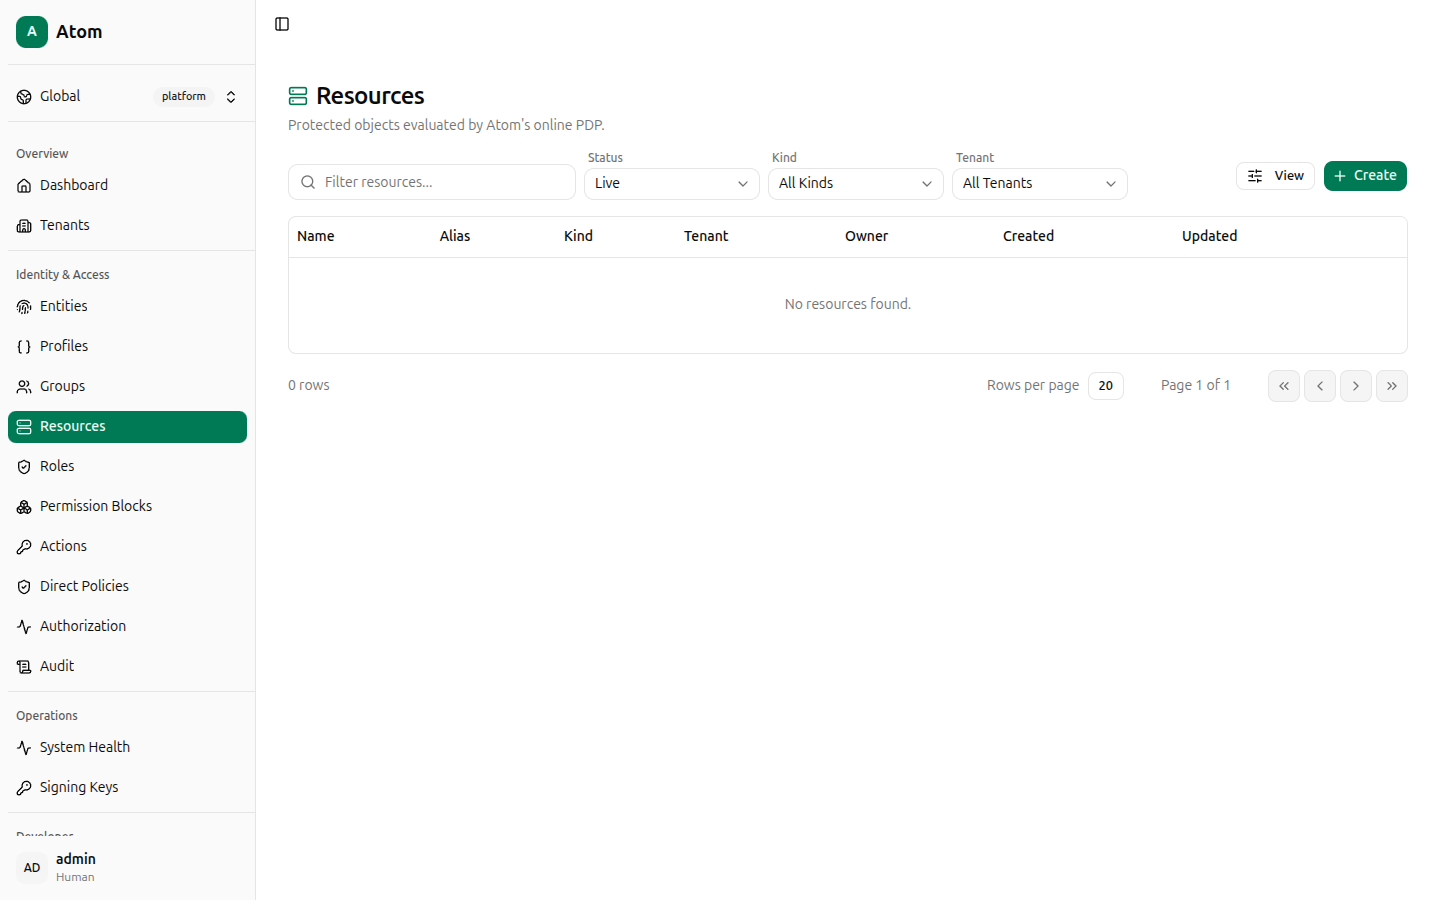
Create a resource
Open Resources. The table starts empty. Click + Create.
Fill in:
- Kind:
invoice - Name:
invoice-events - Tenant:
acme-corp - Leave Owner entity and Attributes JSON at their defaults.
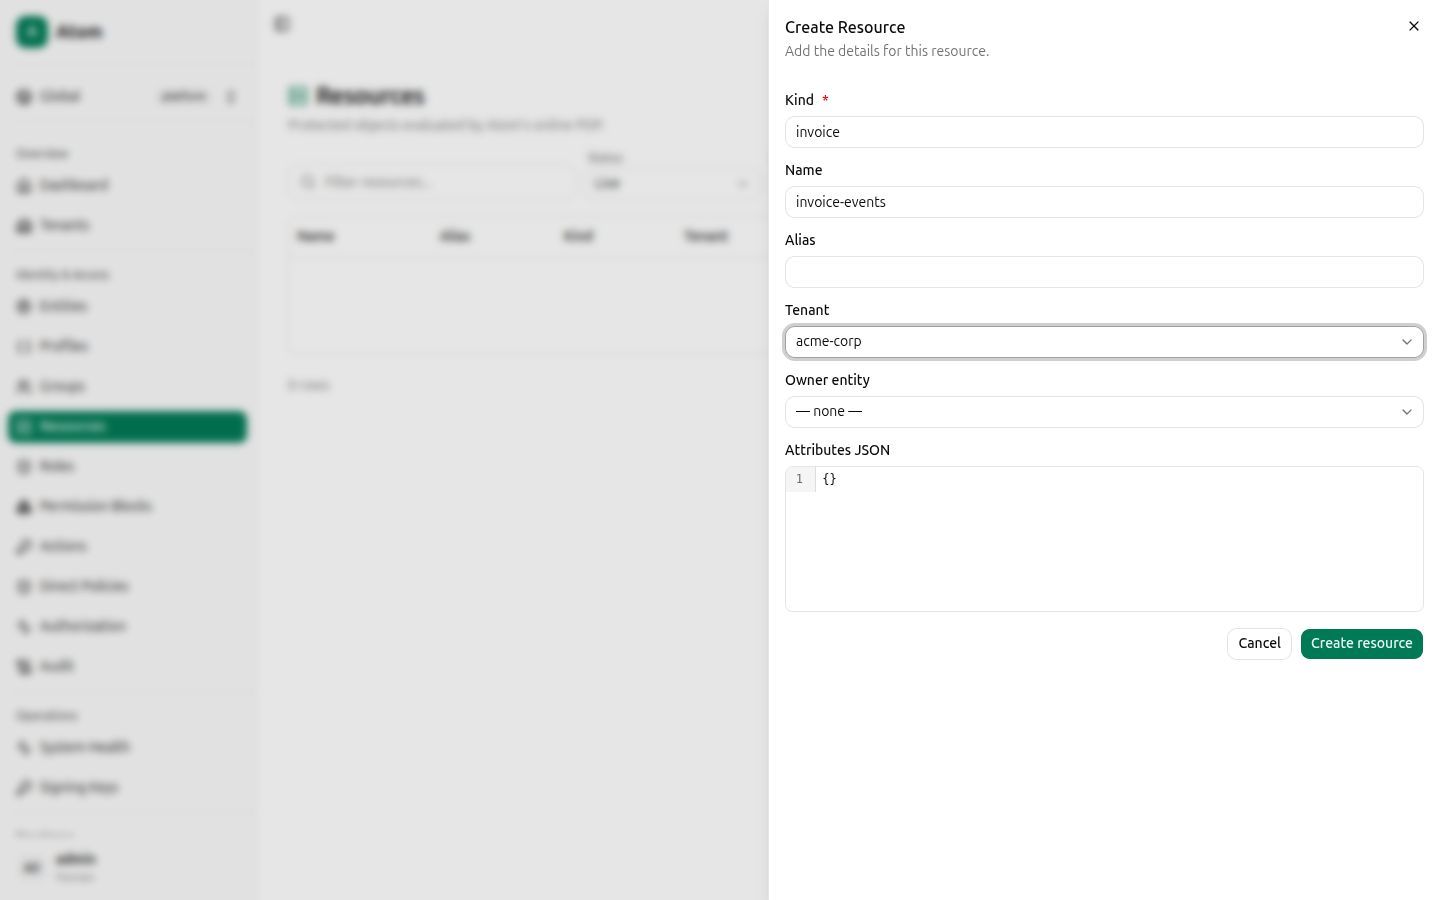
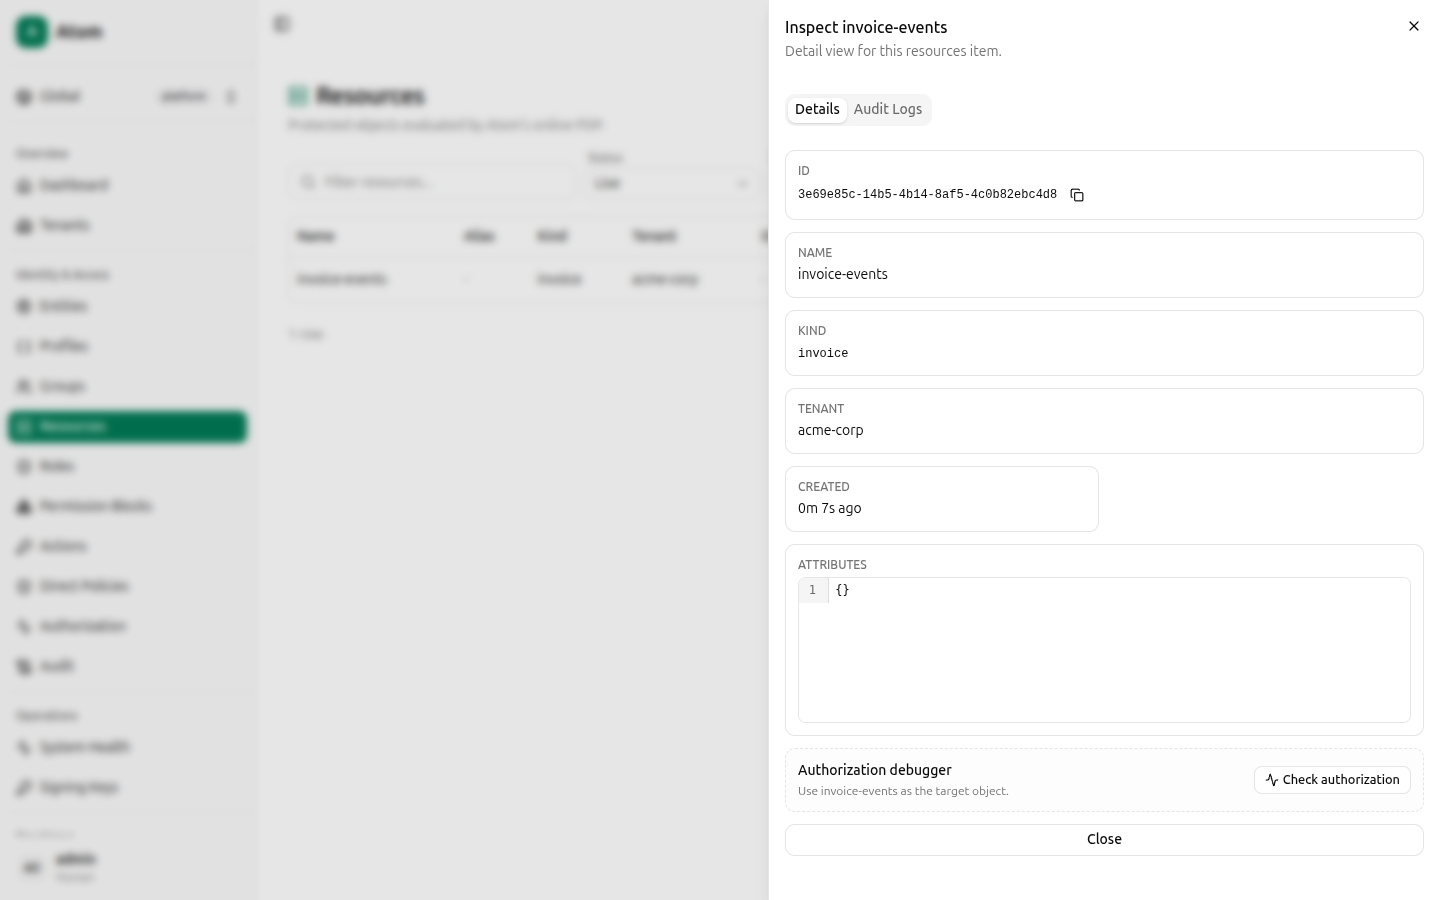
Click Create resource. Open the new row's Inspect view and copy the ID — you'll paste it into the permission block scope in a later step.
Tell Atom which actions apply to invoices
Actions like read and write already exist platform-wide (Atom seeds a standard catalog),
but Atom still needs to know that read and write are valid for the invoice resource
kind. Open Actions → Action Applicability and click + Create.
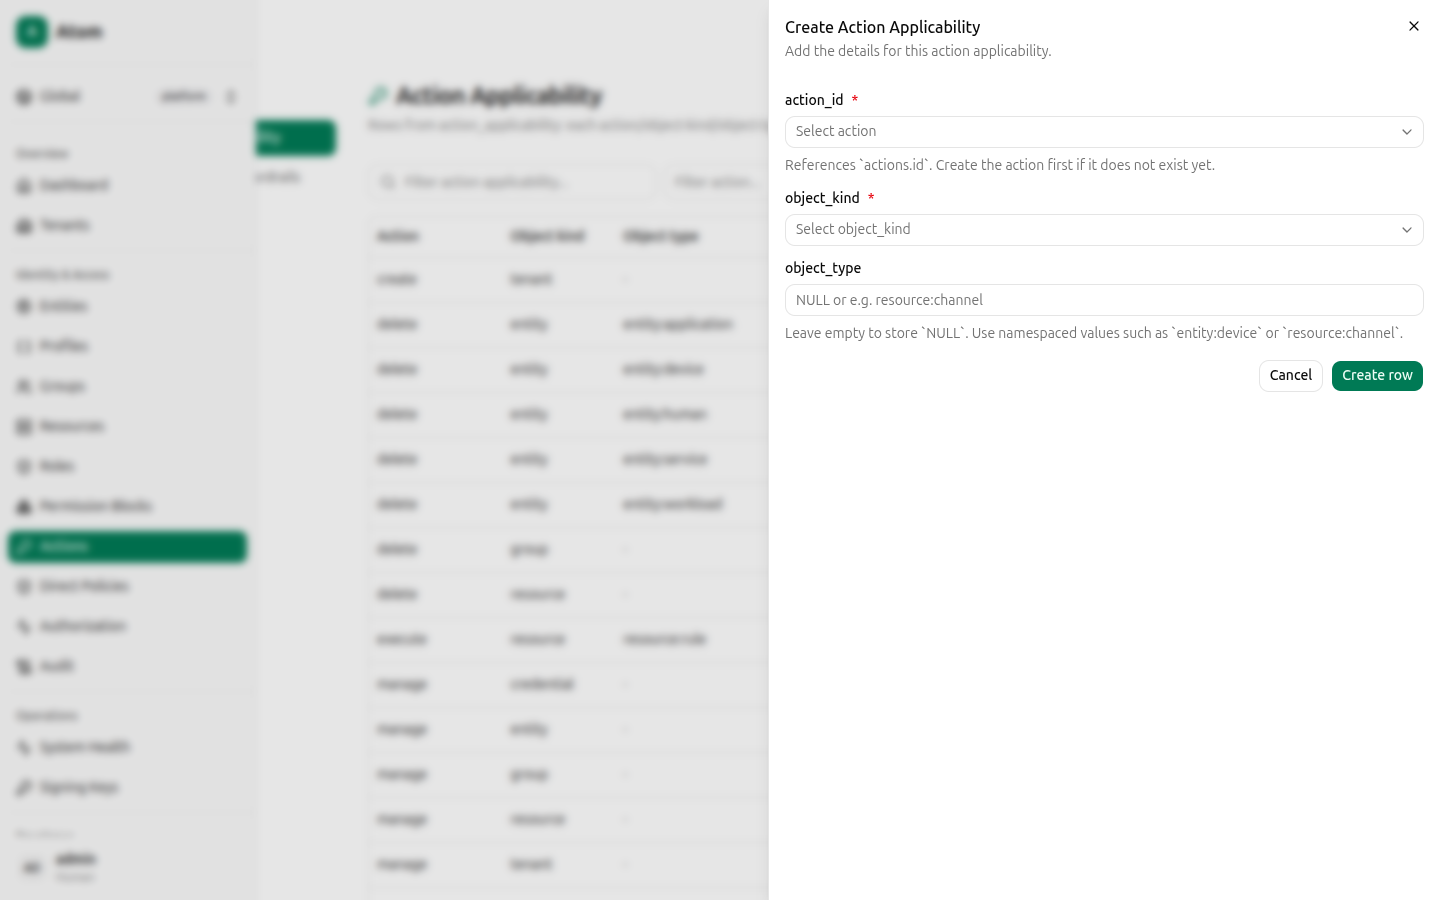
Create one row for read:
- action_id:
read - object_kind:
resource - object_type:
resource:invoice
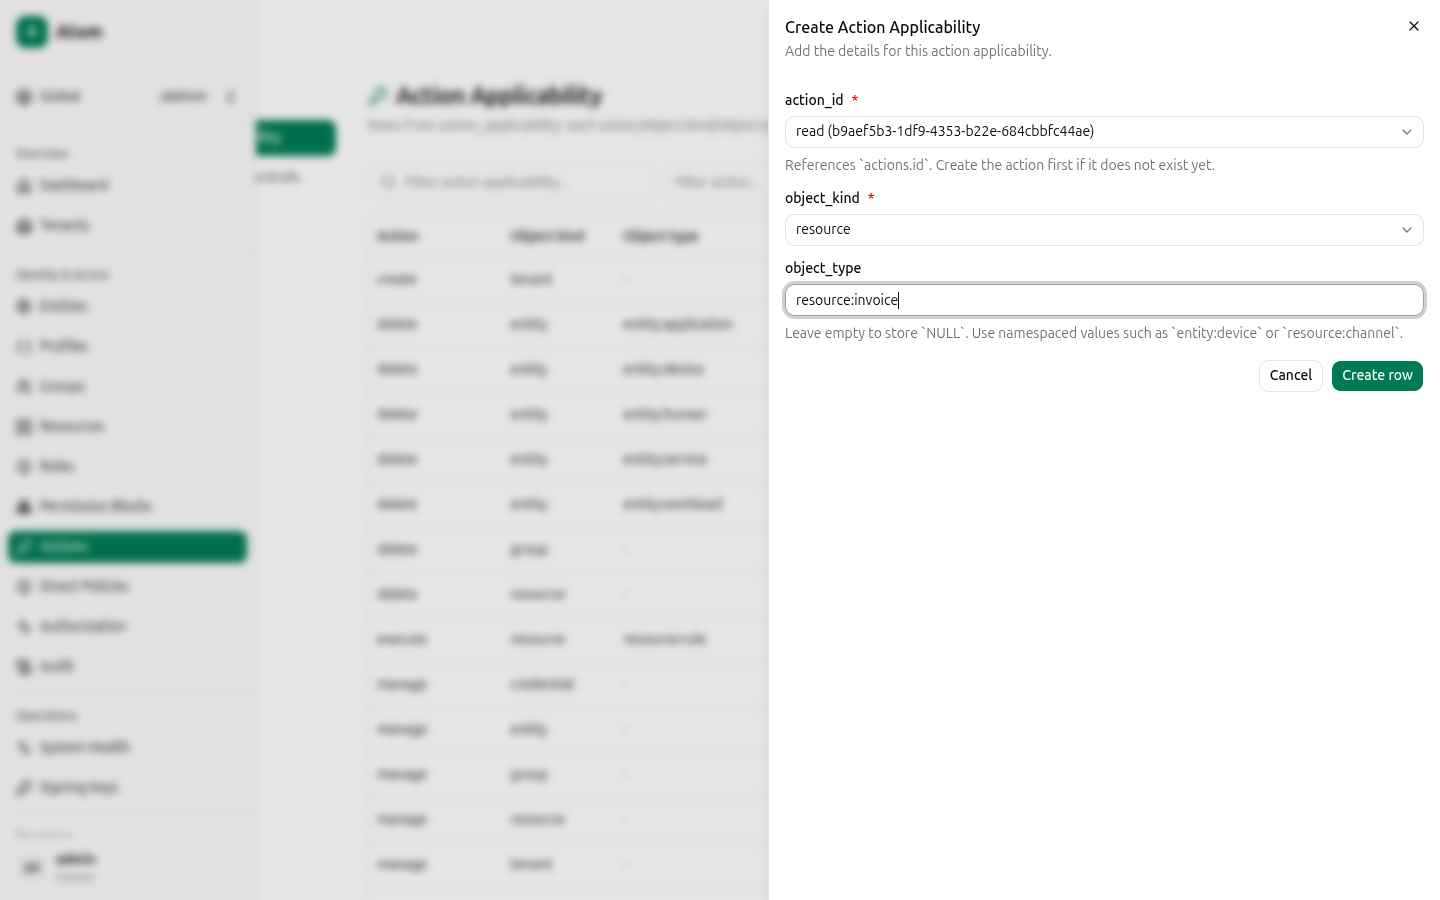
Click Create row, then repeat with action_id set to write (same object_kind and
object_type). See Actions for what Assignment Guardrails (the
third tab in this section) is for — you don't need it here.
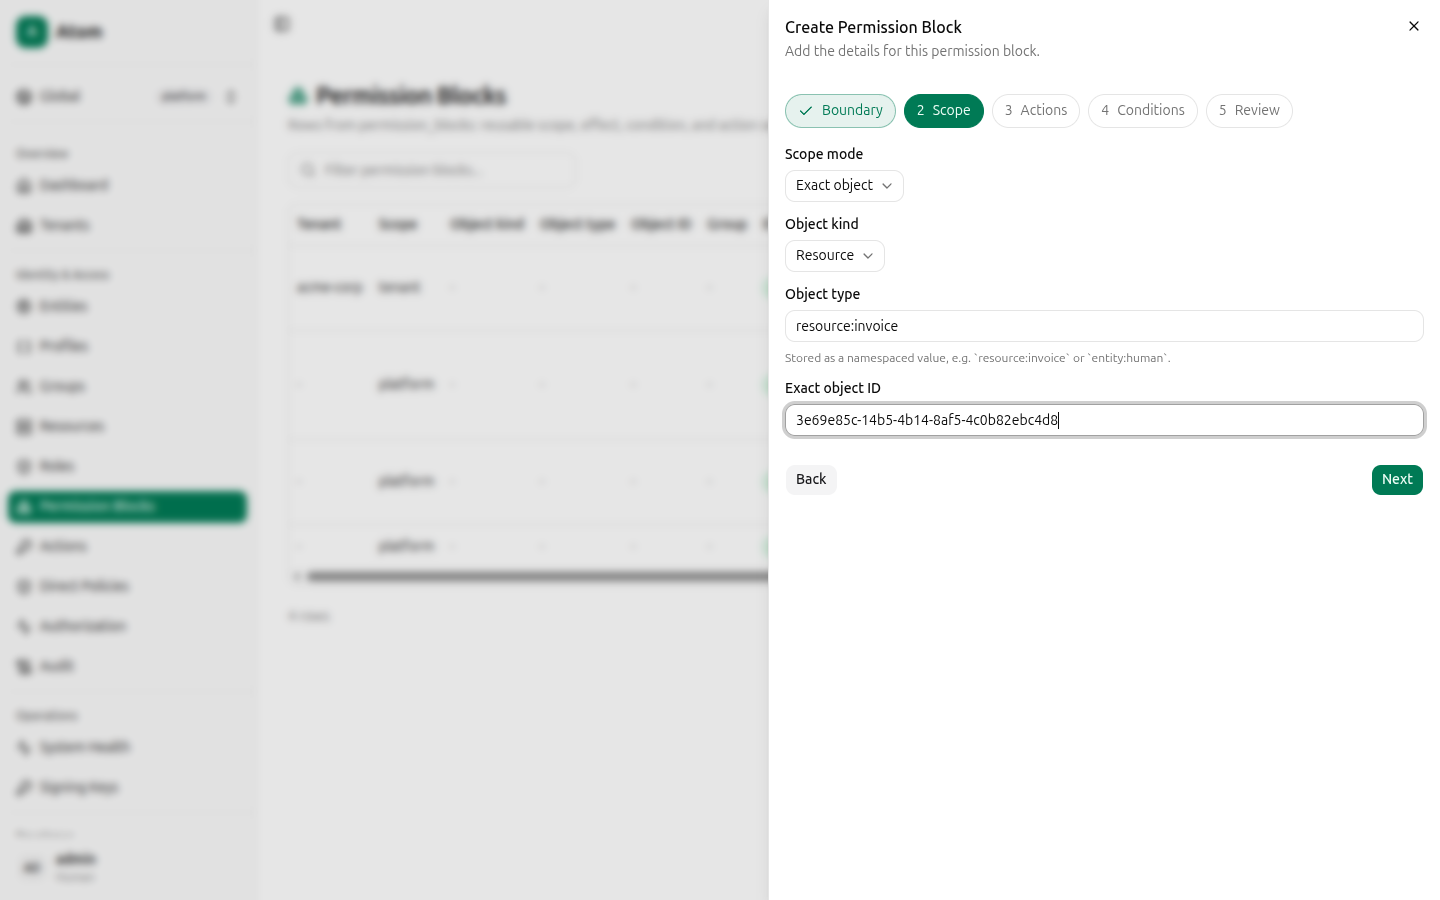
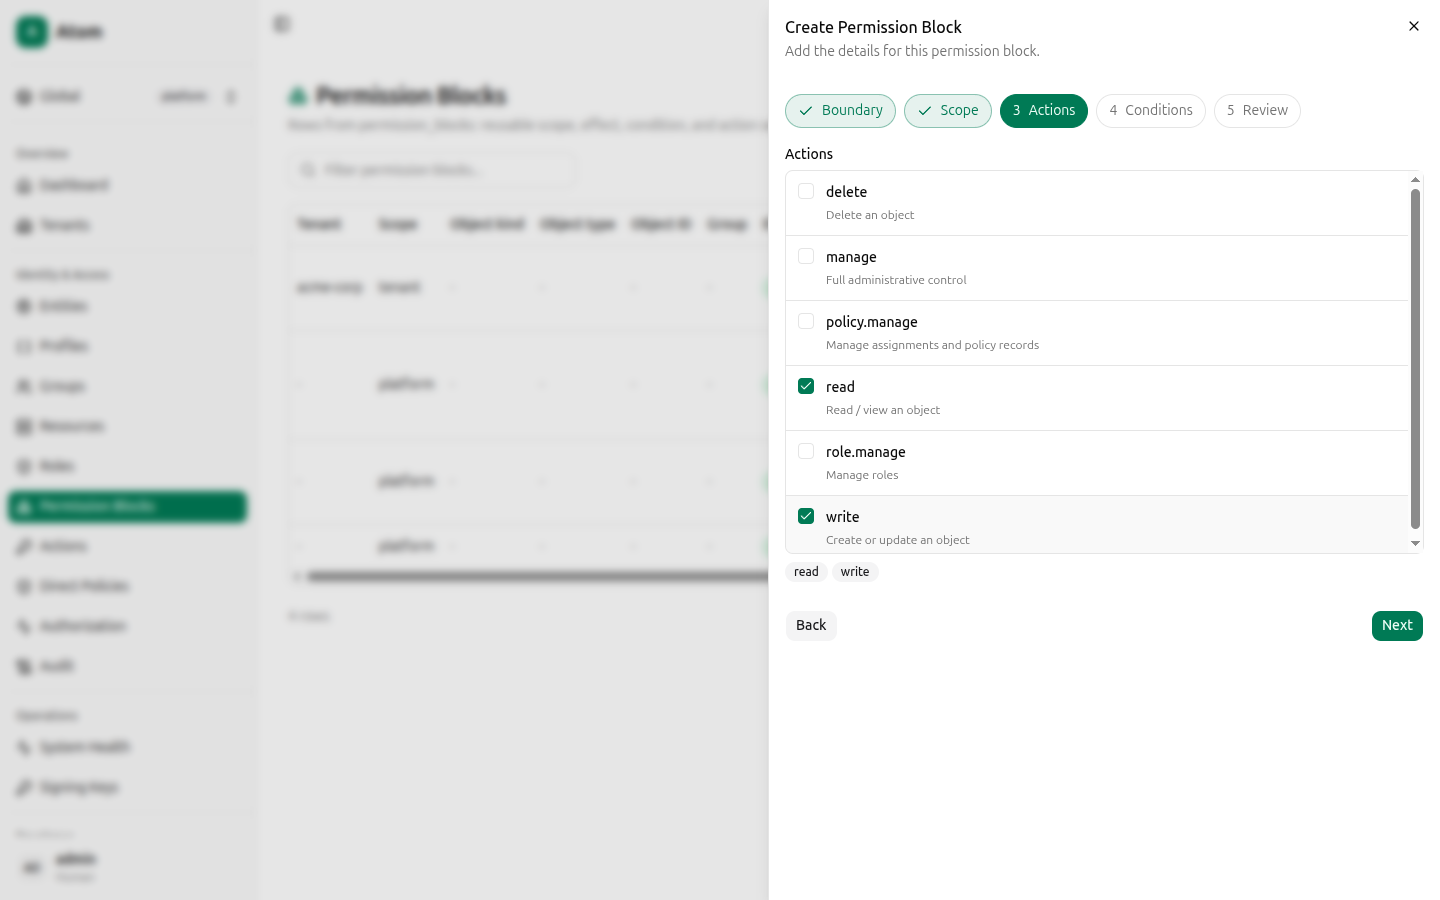
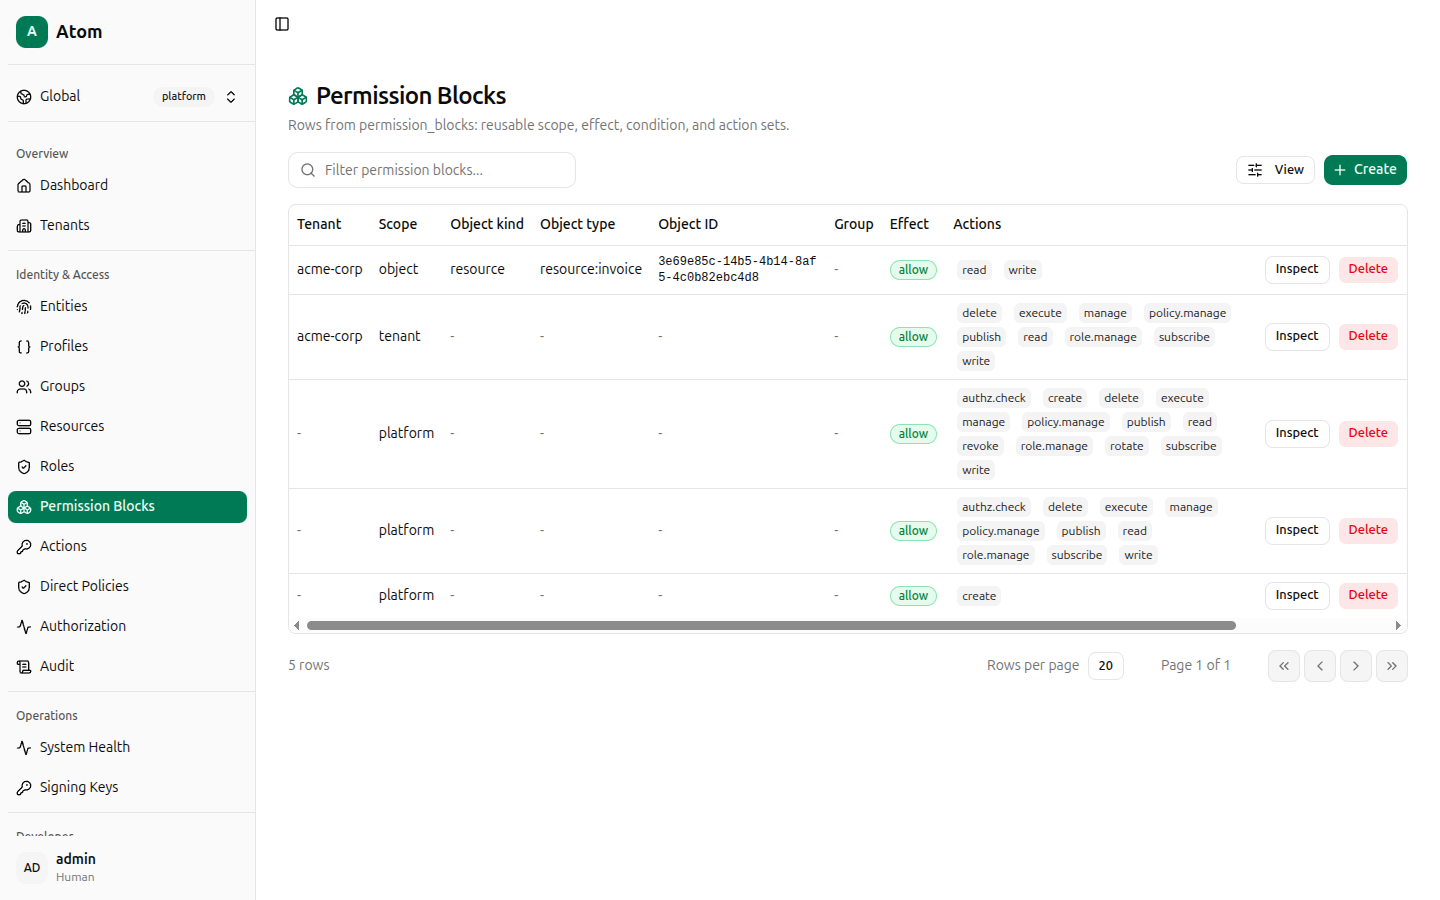
Create two permission blocks
Open Permission Blocks and click + Create. This is a 5-step wizard.
Block 1 — read + write.
- Boundary — set Tenant boundary to
acme-corp, leave Effect asallow. - Scope — set Scope mode to
Exact object, Object kind toResource, enter Object typeresource:invoice, and paste theinvoice-eventsresource ID into Exact object ID. - Actions — check both
readandwrite. - Conditions — leave the JSON as
{}(no ABAC conditions for this walkthrough). - Review — confirm the summary, then click Create permission block.
Block 2 — read only. Repeat the wizard with the same tenant, scope, and object ID, but
check only read in the Actions step.
Both blocks now appear in the table, alongside the seeded platform and tenant-admin blocks.
Create two roles
Open Roles and click + Create. This is a 3-step wizard: Basics, Permission blocks, Review.
Create invoices-reader:
- Tenant:
acme-corp. Role name:invoices-reader. - Under Permission blocks, use the Add permission block dropdown and pick the
read-only block (
resource ... · allow · read). - Review, then Create role.
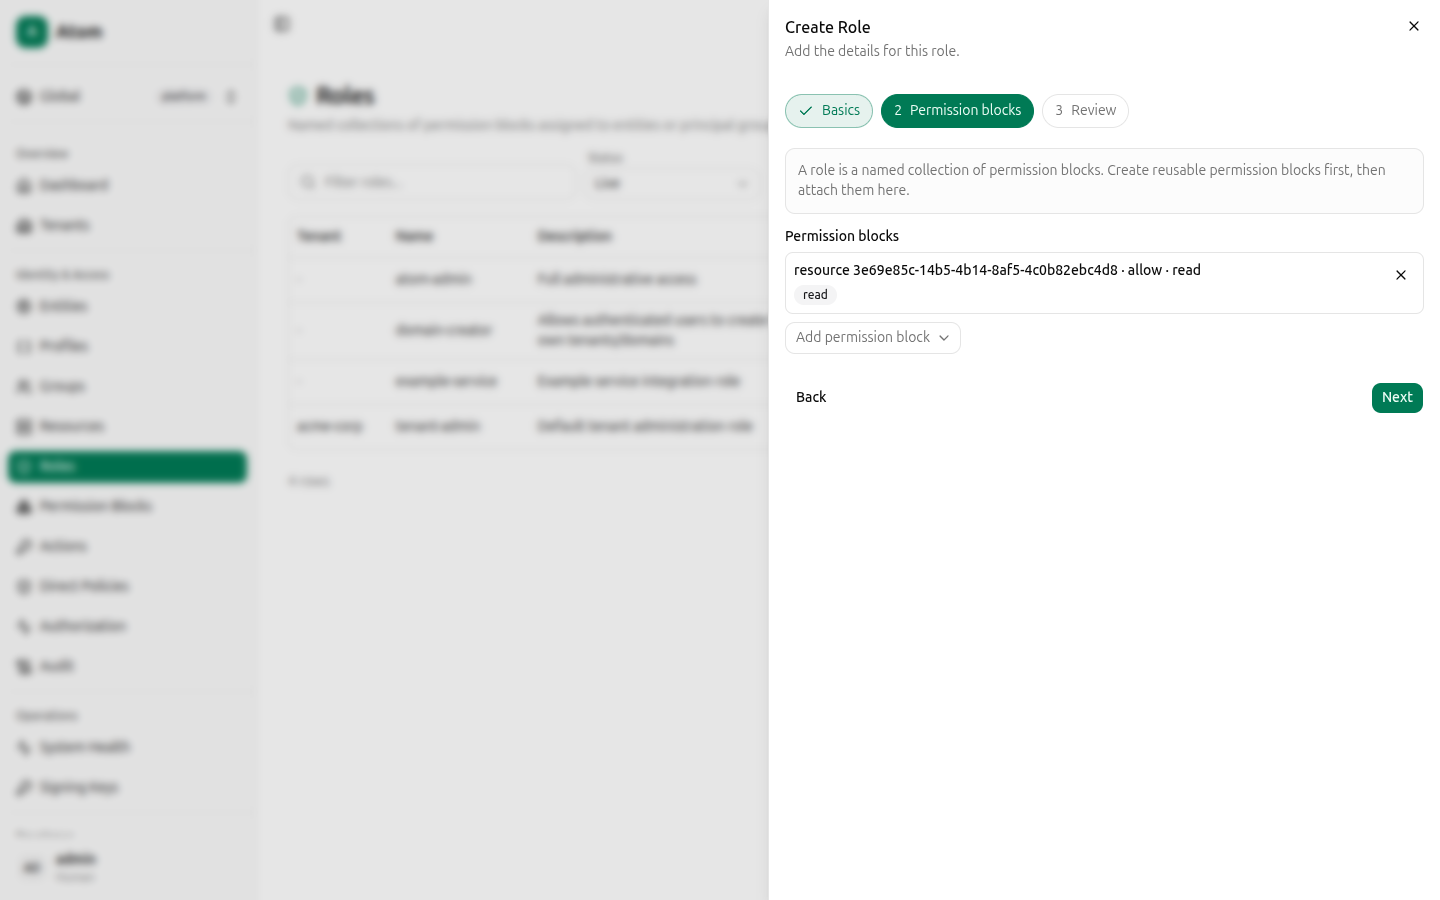
Create invoices-reader-writer the same way, attaching the read+write block instead.
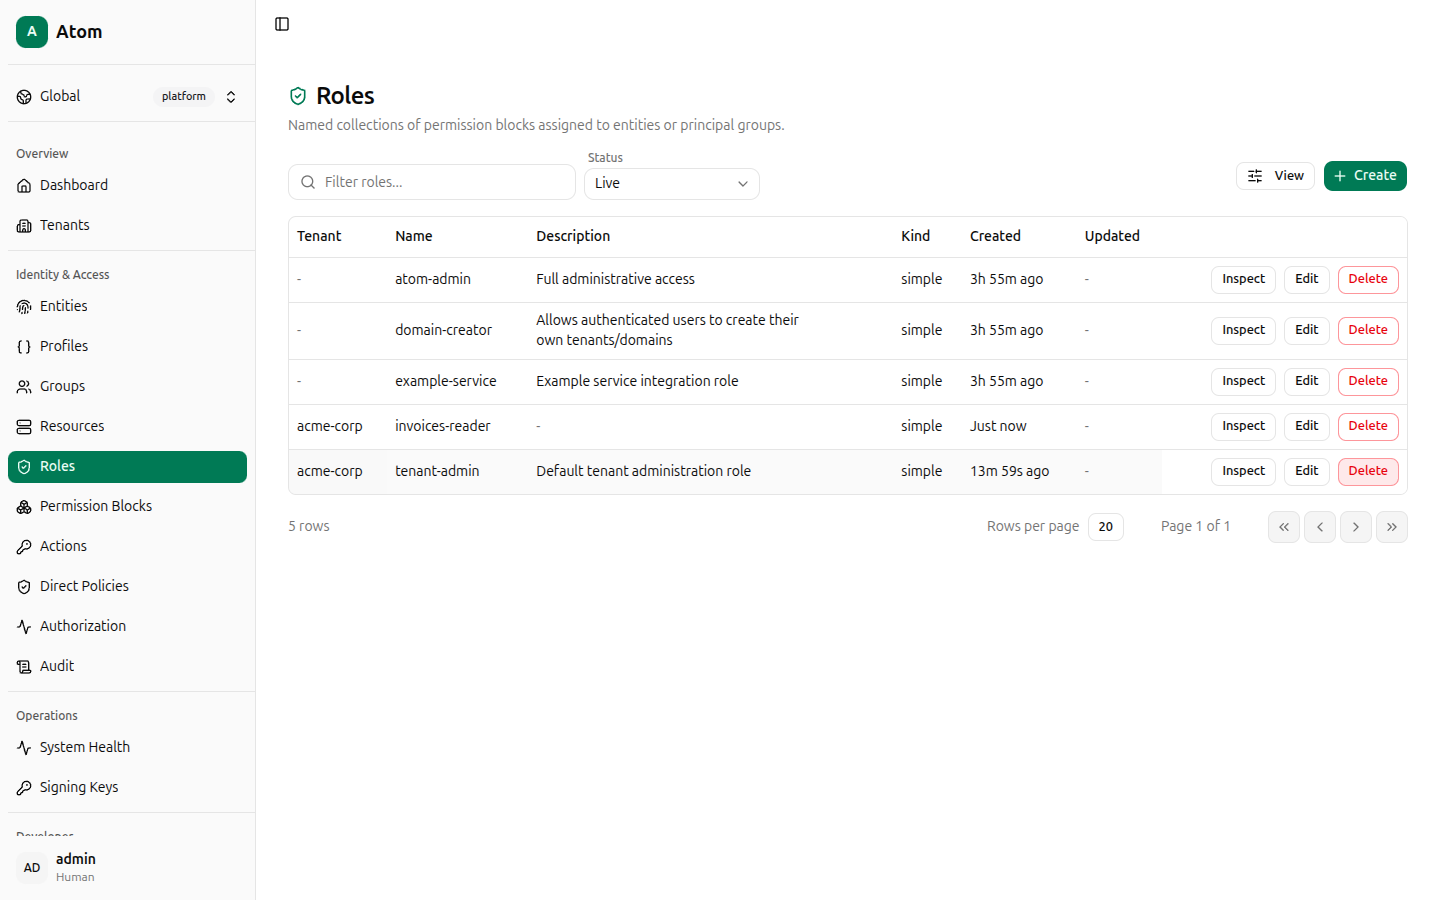
These roles exist to mirror the permission blocks by name and aren't attached to Alice or
billing-service directly in this walkthrough — the next step grants access with Direct
Policies instead, which is what the debugger will explain. Atom's UI does not yet expose a
dedicated "assign role to entity" screen; role-to-principal-group bindings you see in the
Authorization debugger's explanation (like domain-creator via authenticated-users) are
seeded through migrations today. See Roles for more.
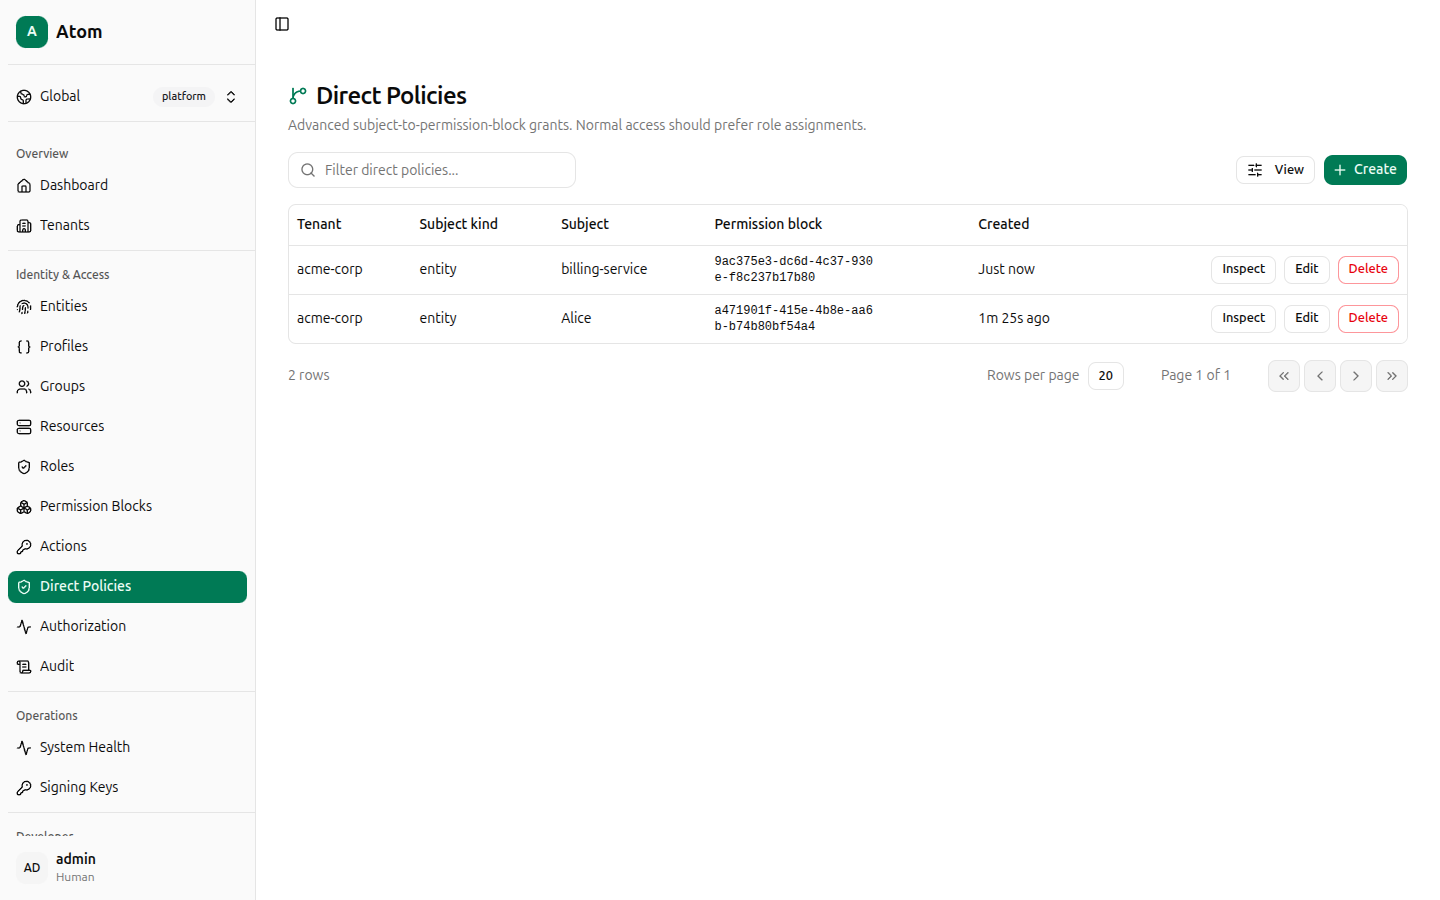
Grant access with direct policies
Open Direct Policies and click + Create. This is a 4-step wizard: Tenant, Subject, Permission block, Review.
Alice's policy — read-only:
- Tenant boundary:
acme-corp. - Subject kind:
Entity. Subject:Alice (human). - Permission block: the read-only block.
- Review, then Create policy.
billing-service's policy — read+write: repeat, picking billing-service (service) as the
subject and the read+write block.
Check authorization
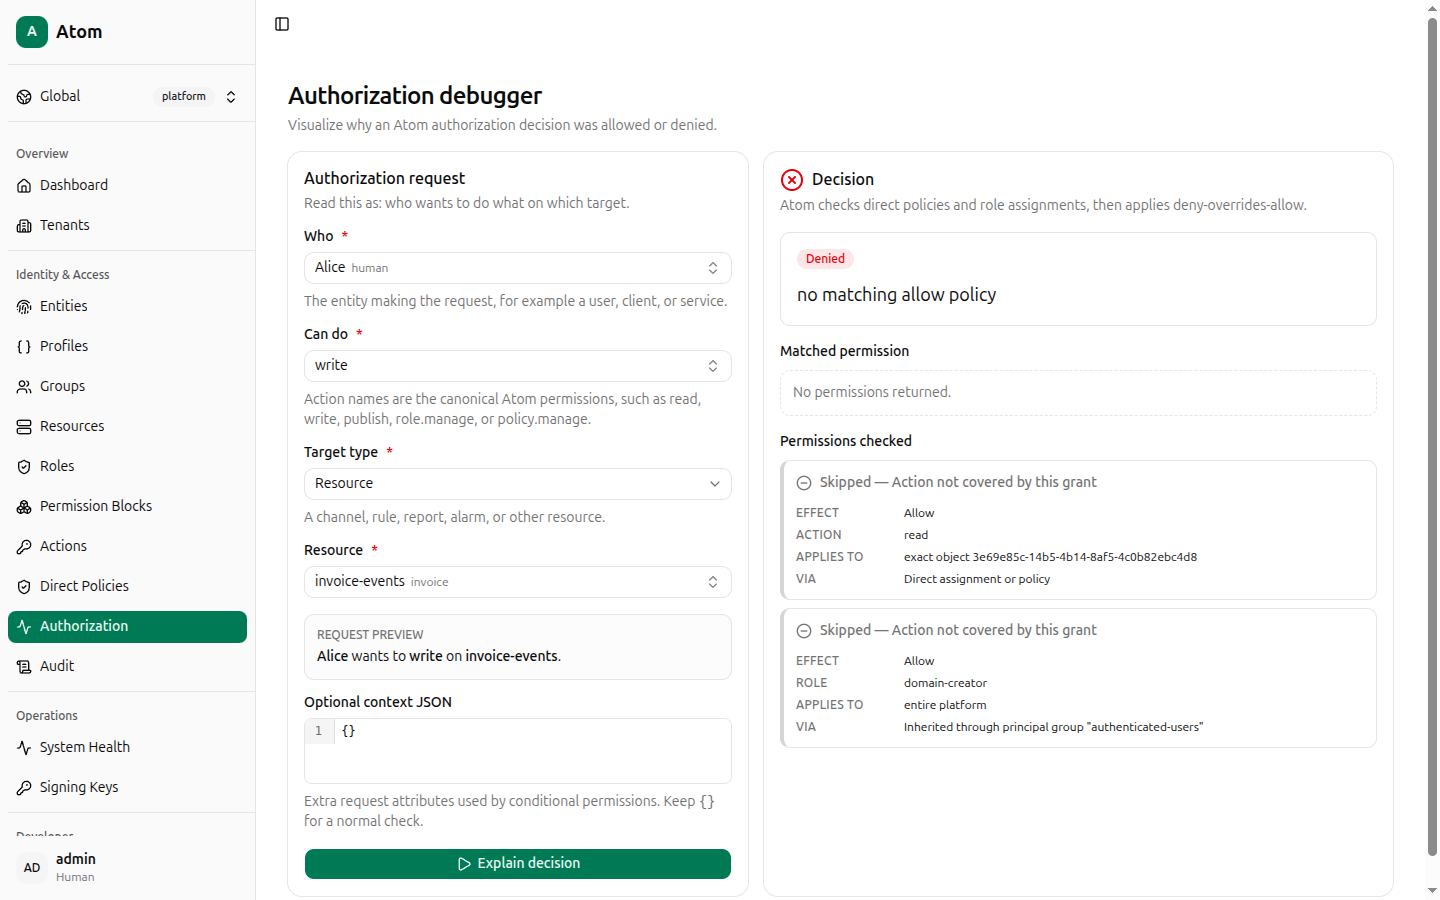
Open Authorization. This is the authorization debugger — pick Who, Can do, Target type, and Resource, then click Explain decision.
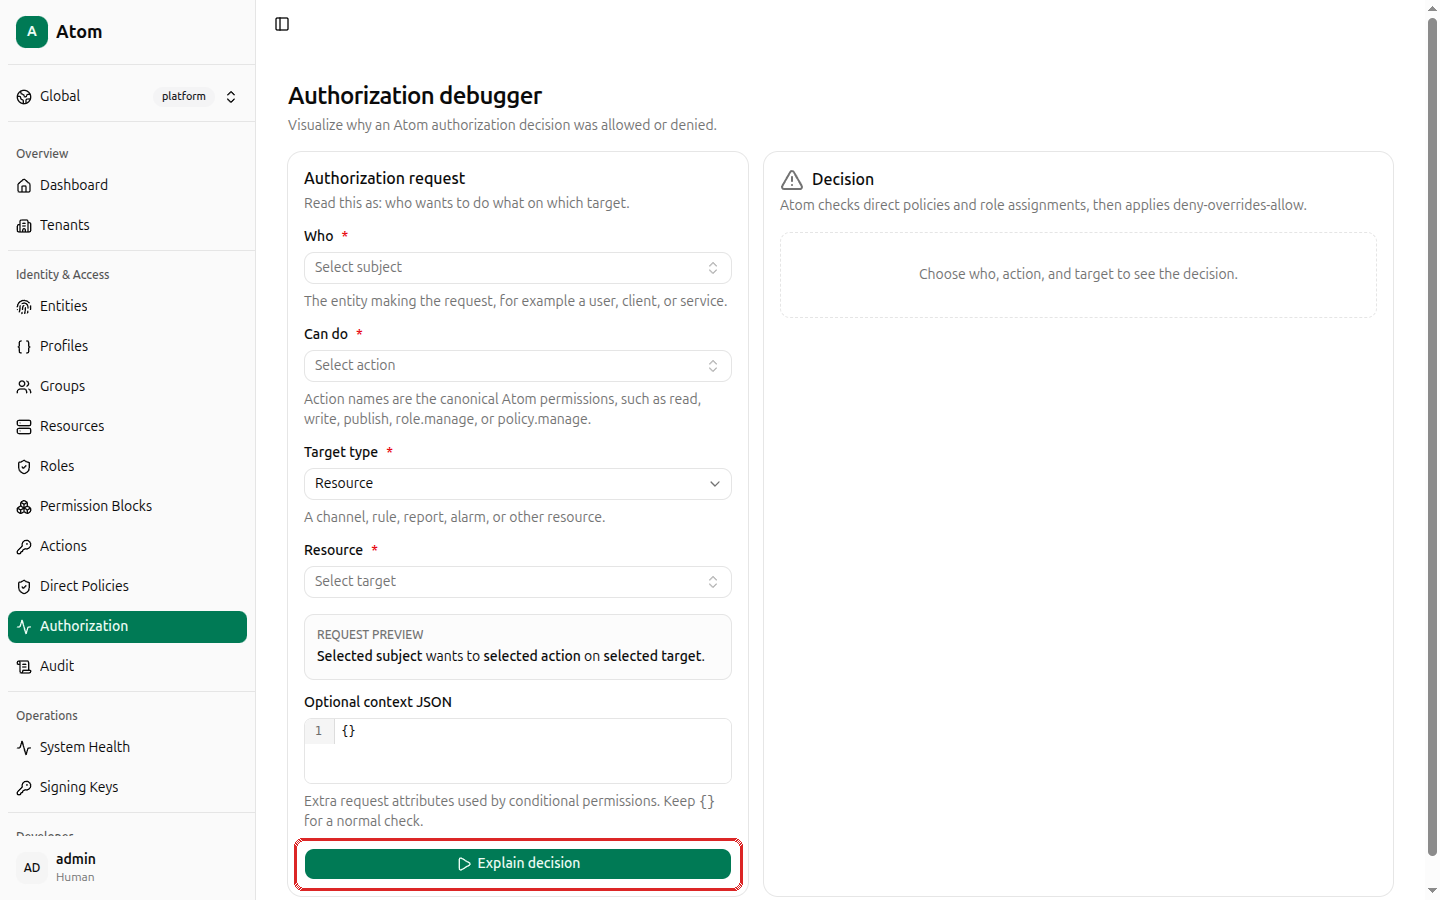
Run all four combinations from this scenario:
| Who | Can do | Target | Expected |
|---|---|---|---|
billing-service | read | invoice-events | Allowed |
billing-service | write | invoice-events | Allowed |
Alice | read | invoice-events | Allowed |
Alice | write | invoice-events | Denied |
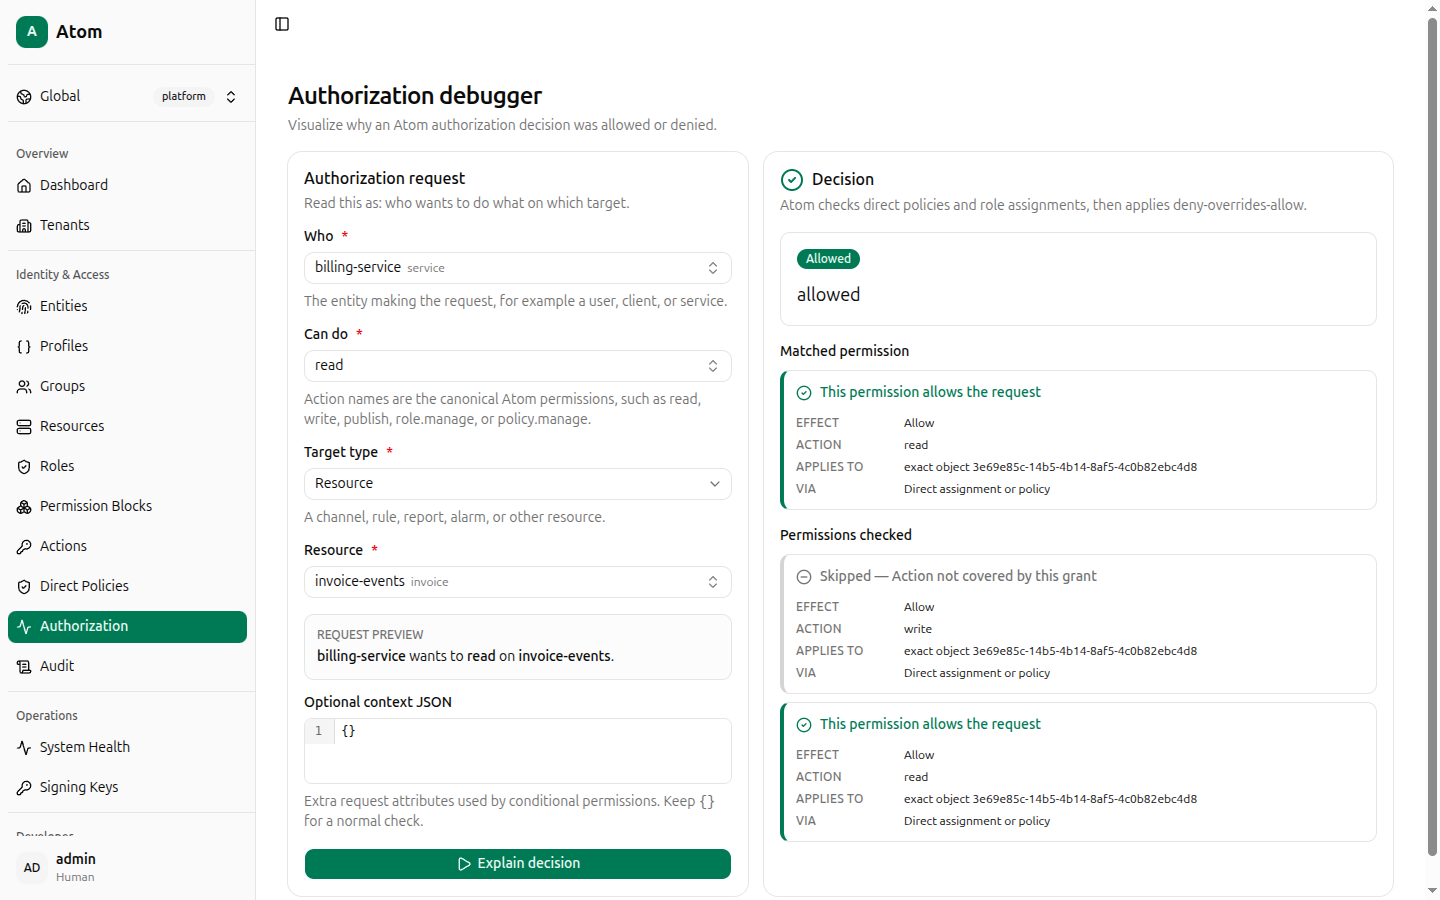
For billing-service reading, the decision panel shows Allowed, the matched permission
(effect: Allow, action: read, scope exact object <resource id>), and — because the same
block also grants write — a second matched permission for that action too.
For Alice writing, the decision is Denied with reason no matching allow policy. The
panel also shows why it isn't a coincidence: Alice's read-only permission block is
Skipped — Action not covered by this grant, and it even surfaces an unrelated inherited
role (domain-creator, via the seeded authenticated-users principal group) that also
doesn't cover write.
What you built
- A tenant boundary (
acme-corp) that scopes everything else. - Two entities representing a human and a service.
- A resource and the action applicability rows that make
read/writevalid for it. - Two permission blocks expressing "read-only" and "read+write" as reusable, named grants.
- Two roles wrapping those blocks (for later reuse — see Roles).
- Two direct policies binding the blocks straight to Alice and billing-service.
- A debugged, explainable authorization decision for every combination.
Continue to Entities for credentials (passwords, API keys,
certificates), or Audit to see every action above recorded as an
immutable audit log entry — including the authz.explain deny you just produced.